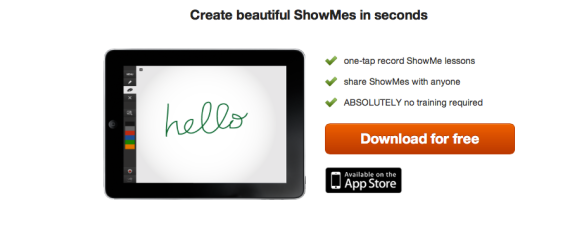
I am devoting this posting to the topic of interactive whiteboard apps and how they can be used in the classroom. I ran across several of these types of apps while searching the iTunes App Store, but I will limit my discussion to just one, namely ShowMe (www.showme.com).
ShowMe allows users to share with the world what they know about any subject or topic by recording their voice, incorporating writing and drawings, and even importing images. The result is a dynamic, multimedia presentation that can be accessed anytime, anywhere. This makes ShowMe ideal for educational use, since teachers can record a lesson, upload it to the ShowMe site, and students can access it whenever they need it. This is a real plus for the student who may need additional explanation or enrichment on a topic at home or, at the other end of the spectrum, the student who is ready to advance in their studies.
The user interface for ShowMe is so simple and intuitive that students will be able to begin creating their own ShowMes in a matter of minutes, with little to no instruction in how to use the app. This is an ideal tool for millennial generation learners, since they prefer active, creative experiences to being passive consumers of content. Also, students can share ShowMe with their peers, which fulfills another need of this generation — the need for social connectivity and interaction.
ShowMe can be accessed on mobile devices, such as iPad and iPhone, but it can also be accessed via the web on desktop and laptop computers. This versatility allows access for individuals via mobile devices, but also allows ShowMe projects to be shared with an entire classroom of students through a computer projection unit setup. This brings “show and tell” into the 21st century and, since it’s a free app, there’s no concern over software compatibility from one computer to the next. My personal experience with this is having students who create slide show presentations at home using OpenOffice, but not realizing that these files are incompatible with Microsoft Office software apps such as Power Point (which is what is used on school computers).
Now that I’ve explained a little about what ShowMe is, I’d like to show you step-by-step how easy it is to create your own ShowMe on iPad:
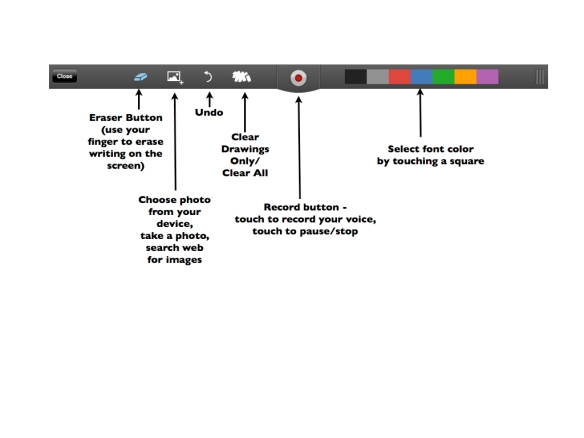
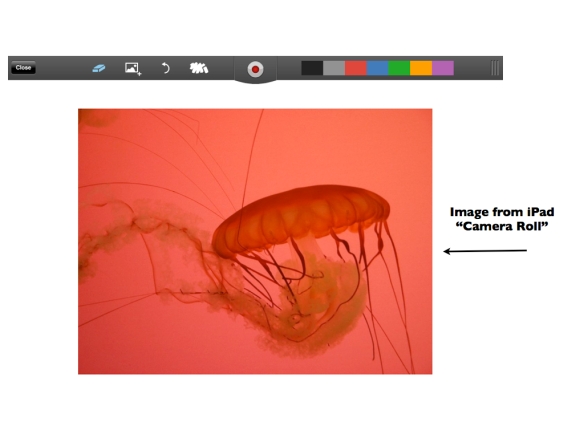
1. When you first open up the app, you’ll see the toolbar along the top of the whiteboard (if you’re holding your iPad in landscape orientation). See the illustration below for an explanation of each icon on the toolbar:
As you can see, the toolbar is very basic and straightforward, which allows for an intuitive, user-friendly experience. You spend little to no time up front learning to use the app; instead, your time is better spent on the topic you’re interested in sharing with others.
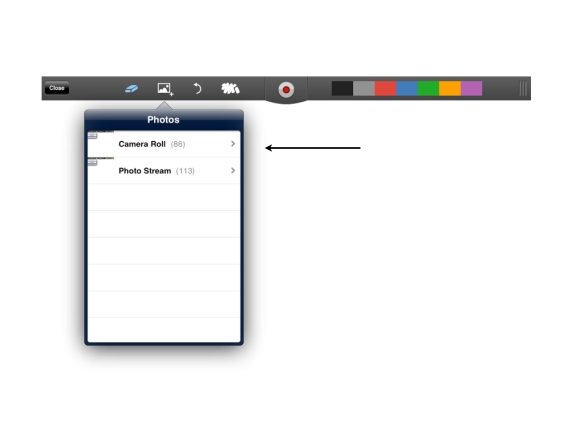
2. I’d like to briefly show you the options for the “Add Image” button, since this is the most complex function on the toolbar (you have three options here!):
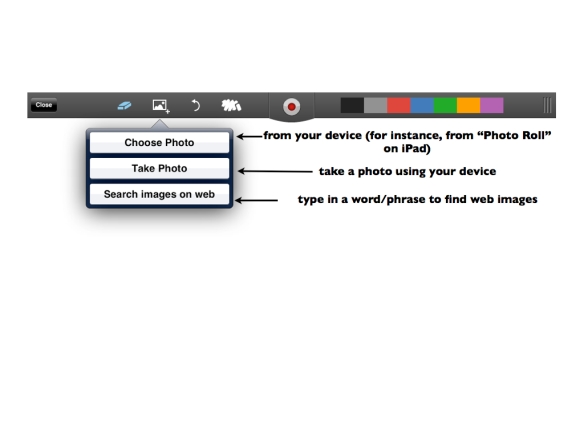
ShowMe Screen Shot, “Add Photo” function
As you see in the screen shot above, you can incorporate photos/images from your own collection on your device, you can take a photo using your device, or you can search for images on the web using the search tool provided within the ShowMe app.
In creating a ShowMe project, I decided to include a picture of a jellyfish I had taken while at Shedd Aquarium in Chicago. Since the photo is on my iPad, I selected “Choose Photo” (the first option in the menu from the above illustration).
3. Next, I selected “Camera Roll” (again, the first option on the pull-down menu):
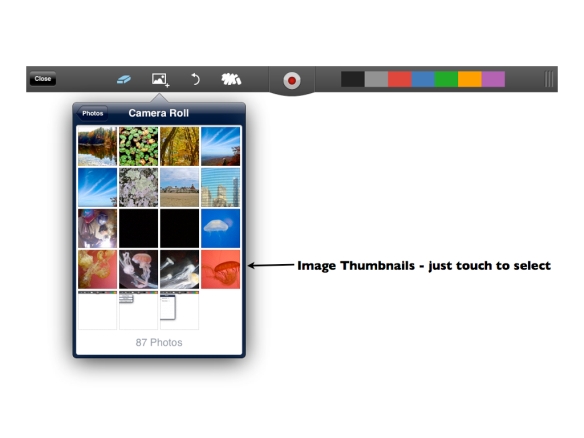
4. After selecting “Camera Roll”, you’ll see thumbnails of your photos. Just make your selection, and the image will appear on the whiteboard.
Here’s the result below:
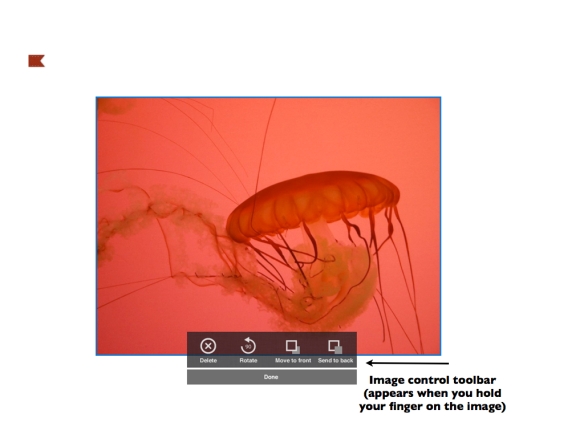
5. At this point, you can rotate your image, move it to the foreground/background, or even delete it. Just start by holding your finger down on the image. This will bring up a small toolbar at the bottom of the image, containing these options:
Also by holding your finger on the image, you can move the image around on the whiteboard, as well as reduce/enlarge it (to reduce/enlarge, simply slide your thumb and forefinger together/apart in a pincer position; this is the same motion you would use to reduce/enlarge images/web pages anywhere else on your iPad).
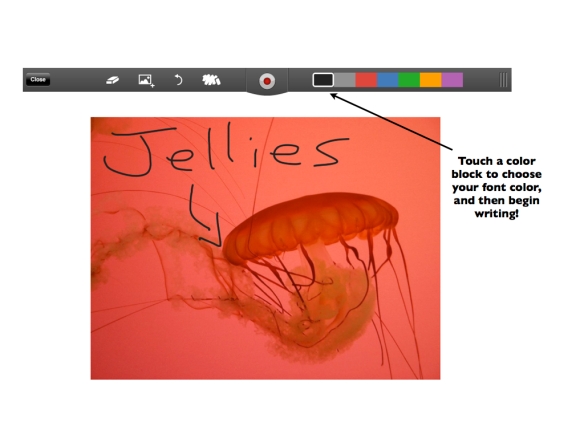
6. Finally, you can write anywhere on or around the image that you’ve inserted into your ShowMe. So, you can record your voice to explain your topic while you write on/around your image to enhance your explanation. Nota Bene: I advise you to add the images you will use first before you begin recording your ShowMe. As I was experimenting with the app, I noticed that when I tried to add an image while recording, the action of selecting this toolbar function paused the recording. However, you can still write/erase/change font colors while recording. You can also reduce/enlarge/move your images around on the whiteboard while recording.
Now that you’ve seen just how easy it is, start making some ShowMe’s to share!
Ideas for Classroom Use:
Math: Illustrate and explain mathematical problem solving step-by-step; use to graph equations
English/World Languages: Explain parts of speech; diagram sentences; perhaps even tell a short story
Science: Make presentations on animals, weather phenomena, geology, anatomy, etc.
I’d love to hear about your ideas for using this app. Add a comment to this posting, and share!

